Creating a chat application using React and ASP.NET Core - Part 2
Jürgen Gutsch - 07 February, 2018
In this blog series, I'm going to create a small chat application using React and ASP.NET Core, to learn more about React and to learn how React behaves in an ASP.NET Core project during development and deployment. This Series is divided into 5 parts, which should cover all relevant topics:
- React Chat Part 1: Requirements & Setup
- React Chat Part 2: Creating the UI & React Components
- React Chat Part 3: Adding Websockets using SignalR
- React Chat Part 4: Authentication & Storage
- React Chat Part 5: Deployment to Azure
I also set-up a GitHub repository where you can follow the project: https://github.com/JuergenGutsch/react-chat-demo. Feel free to share your ideas about that topic in the comments below or in issues on GitHub. Because I'm still learning React, please tell me about significant and conceptual errors, by dropping a comment or by creating an Issue on GitHub. Thanks.
Basic Layout
First let's have a quick look into the hierarchy of the React components in the folder ClientApp.
The app gets bootstrapped within the boot.tsx file. This is the first sort of component where the AppContainer gets created and the router is placed. This file also contains the the call to render the react app in the relevant HTML element, which is a div with the ID react-app in this case. It is a div in the Views/Home/Index.cshtml
This component also renders the content of the routes.tsx. This file contains the route definitions wrapped inside a Layout element. This Layout element is defined in the layout.tsx inside the components folder. The routes.tsx also references three more components out of the components folder: Home, Counter and FetchData. So it seems the router renders the specific components, depending on the requested path inside the Layout element:
// routes.tsx
import * as React from 'react';
import { Route } from 'react-router-dom';
import { Layout } from './components/Layout';
import { Home } from './components/Home';
import { FetchData } from './components/FetchData';
import { Counter } from './components/Counter';

export const routes = <Layout>
    <Route exact path='/' component={ Home } />
    <Route path='/counter' component={ Counter } />
    <Route path='/fetchdata' component={ FetchData } />
</Layout>;
As expected, the Layout component than defines the basic layout and renders the contents into a Bootstrap grid column element. I changed that a little bit to render the contents directly into the fluid container and the menu is now outside the fluid container. This component now contains less code than before.:
import * as React from 'react';
import { NavMenu } from './NavMenu';

export interface LayoutProps {
    children?: React.ReactNode;
}

export class Layout extends React.Component<LayoutProps, {}> {
    public render() {
        return <div>
            <NavMenu />
            <div className='container-fluid'>
                {this.props.children}
            </div>
        </div>;
    }
}
I also changed the NavMenu component to place the menu on top of the page using the typical Bootstrap styles. (Visit the repository for more details.)
My chat goes into the Home component, because this is the most important feature of my app ;-) This is why I removed all the contents of the Home component and placed the layout for the actual chat there.
import * as React from 'react';
import { RouteComponentProps } from 'react-router';

import { Chat } from './home/Chat';
import { Users } from './home/Users';

export class Home extends React.Component<RouteComponentProps<{}>, {}> {
    public render() {
        return <div className='row'>
            <div className='col-sm-3'>
              	<Users />
            </div>
            <div className='col-sm-9'>
                <Chat />
            </div>
        </div>;
    }
}
This component uses two new components: Users to display the online users and Chat to add the main chat functionalities. It seems to be a common way in Rdeact to store sub-components inside a subfolder with the same name as the parent component. So, I created a Home folder inside the components folder and placed the Users component and the Chat component inside of that new folder.
The Users Component
Let's have a look into the more simple Users component first. This component doesn't have any interaction yet. It only fetches and displays the users online. To keep the first snippet simple I removed the methods inside. This file imports all from the module 'react' as React object. Using this we are able to access the Component type we need to derive from:
// components/Home/Users.tsx
import * as React from 'react';

interface UsersState {
    users: User[];
}
interface User {
    id: number;
    name: string;
}

export class Users extends React.Component<{}, UsersState> {
    //
}
This base class also defines a state property. The type of that state is defined in the second generic argument of the React.Component base class. (The first generic argument is not needed here). The state is a kind of a container type that contains data you want to store inside the component. In this case I just need a UsersState with a list of users inside. To display a user in the list we only need an identifier and a name. A unique key or id is required by React to create a list of items in the DOM
I don't fetch the data from the server side yet. This post is only about the UI components, so I'm going to mock the data in the constructor:
constructor() {
    super();
    this.state = {
        users: [
            { id: 1, name: 'juergen' },
            { id: 3, name: 'marion' },
            { id: 2, name: 'peter' },
            { id: 4, name: 'mo' }]
    };
}
Now the list of users is available in the current state and I'm able to use this list to render the users:
public render() {
    return <div className='panel panel-default'>
        <div className='panel-body'>
            <h3>Users online:</h3>
            <ul className='chat-users'>
                {this.state.users.map(user =>
                    <li key={user.id}>{user.name}</li>
                )}
            </ul>
        </div>
    </div>;
}
JSX is a wired thing: HTML like XML syntax, completely mixed with JavaScript (or TypeScript in this case) but it works. It remembers a little bit like Razor. this.state.users.map iterates through the users and renders a list item per user.
The Chat Component
The Chat component is similar, but contains more details and some logic to interact with the user. Initially we have almost the same structure:
// components/Home/chat.tsx
import * as React from 'react';
import * as moment from 'moment';

interface ChatState {
    messages: ChatMessage[];
    currentMessage: string;
}
interface ChatMessage {
    id: number;
    date: Date;
    message: string;
    sender: string;
}

export class Chat extends React.Component<{}, ChatState> {
    //
}
I also imported the module moment, which is moment.js I installed using NPM:
npm install moment --save
moment.js is a pretty useful library to easily work with dates and times in JavaScript. It has a ton of features, like formatting dates, displaying times, creating relative time expressions and it also provides a proper localization of dates.
Now it makes sense to have a look into the render method first:
// components/Home/chat.tsx
public render() {
    return <div className='panel panel-default'>
        <div className='panel-body panel-chat'
            ref={this.handlePanelRef}>
            <ul>
                {this.state.messages.map(message =>
                    <li key={message.id}><strong>{message.sender} </strong>
                        ({moment(message.date).format('HH:mm:ss')})<br />
                        {message.message}</li>
                )}
            </ul>
        </div>
        <div className='panel-footer'>
            <form className='form-inline' onSubmit={this.onSubmit}>
                <label className='sr-only' htmlFor='msg'>Message</label>
                <div className='input-group col-md-12'>
                    <button className='chat-button input-group-addon'>:-)</button>
                    <input type='text' value={this.state.currentMessage}
                        onChange={this.handleMessageChange}
                        className='form-control'
                        id='msg'
                        placeholder='Your message'
                        ref={this.handleMessageRef} />
                    <button className='chat-button input-group-addon'>Send</button>
                </div>
            </form>
        </div>
    </div>;
}
I defined a Bootstrap panel, that has the chat area in the panel-body and the input fields in the panel-footer. In the chat area we also have a unordered list ant the code to iterate through the messages. This is almost similar to the user list. We only display some more date here. Here you can see the usage of moment.js to easily format the massage date.
The panel-footer contains the form to compose the message. I used a input group to add a button in front of the input field and another one after that field. The first button is used to select an emoji. The second one is to also send the message (for people who cannot use the enter key to submit the message).
The ref attributes are used for a cool feature. Using this, you are able to get an instance of the element in the backing code. This is nice to work with instances of elements directly. We will see the usage later on. The code in the ref attributes are pointing to methods, that get's an instance of that element passed in:
msg: HTMLInputElement;
panel: HTMLDivElement;

// ...

handlePanelRef(div: HTMLDivElement) {
    this.panel = div;
}
handleMessageRef(input: HTMLInputElement) {
    this.msg = input;
}
I save the instance globally in the class. One thing I didn't expect is a wired behavior of this. This behavior is a typical JavaScript behavior, but I expected is to be solved in TypeScript. I also didn't see this in Angular. The keyword this is not set. It is nothing. If you want to access this in methods used by the DOM, you need to kinda 'inject' or 'bind' an instance of the current object to get this set. This is typical for JavaScript and makes absolutely sense This needs to be done in the constructor:
constructor() {
    super();
    this.state = { messages: [], currentMessage: '' };

    this.handlePanelRef = this.handlePanelRef.bind(this);
    this.handleMessageRef = this.handleMessageRef.bind(this);
    // ...
}
This is the current constructor, including the initialization of the state. As you can see, we bind the the current instance to those methods. We need to do this for all methods, that need to use the current instance.
To get the message text from the text field, it is needed to bind an onChange method. This method collects the value from the event target:
handleMessageChange(event: any) {
    this.setState({ currentMessage: event.target.value });
}
Don't forget to bind the current instance in the constructor:
this.handleMessageChange = this.handleMessageChange.bind(this);
With this code we get the current message into the state to use it later on. The current state is also bound to the value of that text field, just to clear this field after submitting that form.
The next important event is onSubmit in the form. This event gets triggered by pressing the send button or by pressing enter inside the text field:
onSubmit(event: any) {
    event.preventDefault();
    this.addMessage();
}
This method stops the default behavior of HTML forms, to avoid a reload of the entire page. And calls the method addMessage, that creates and ads the message to the current states messages list:
addMessage() {
    let currentMessage = this.state.currentMessage;
    if (currentMessage.length === 0) {
        return;
    }
    let id = this.state.messages.length;
    let date = new Date();

    let messages = this.state.messages;
    messages.push({
        id: id,
        date: date,
        message: currentMessage,
        sender: 'juergen'
    })
    this.setState({
        messages: messages,
        currentMessage: ''
    });
    this.msg.focus();
    this.panel.scrollTop = this.panel.scrollHeight - this.panel.clientHeight;
}
Currently the id and the sender of the message are faked. Later on, in the next posts, we'll send the message to the server using Websockets and we'll get a massage including a valid id back. We'll also have an authenticated user later on. As mentioned the current post, is just about to get the UI running.
We get the currentMessage and the massages list out of the current state. Than we add the new message to the current list and assign a new state, with the updated list and an empty currentMessage. Setting the state triggers an event to update the the UI. If I just update the fields inside the state, the UI don't get notified. It is also possible to only update a single property of the state.
If the state is updated, I need to focus the text field and to scroll the panel down to the latest message. This is the only reason, why I need the instance of the elements and why I used the ref methods.
That's it :-)
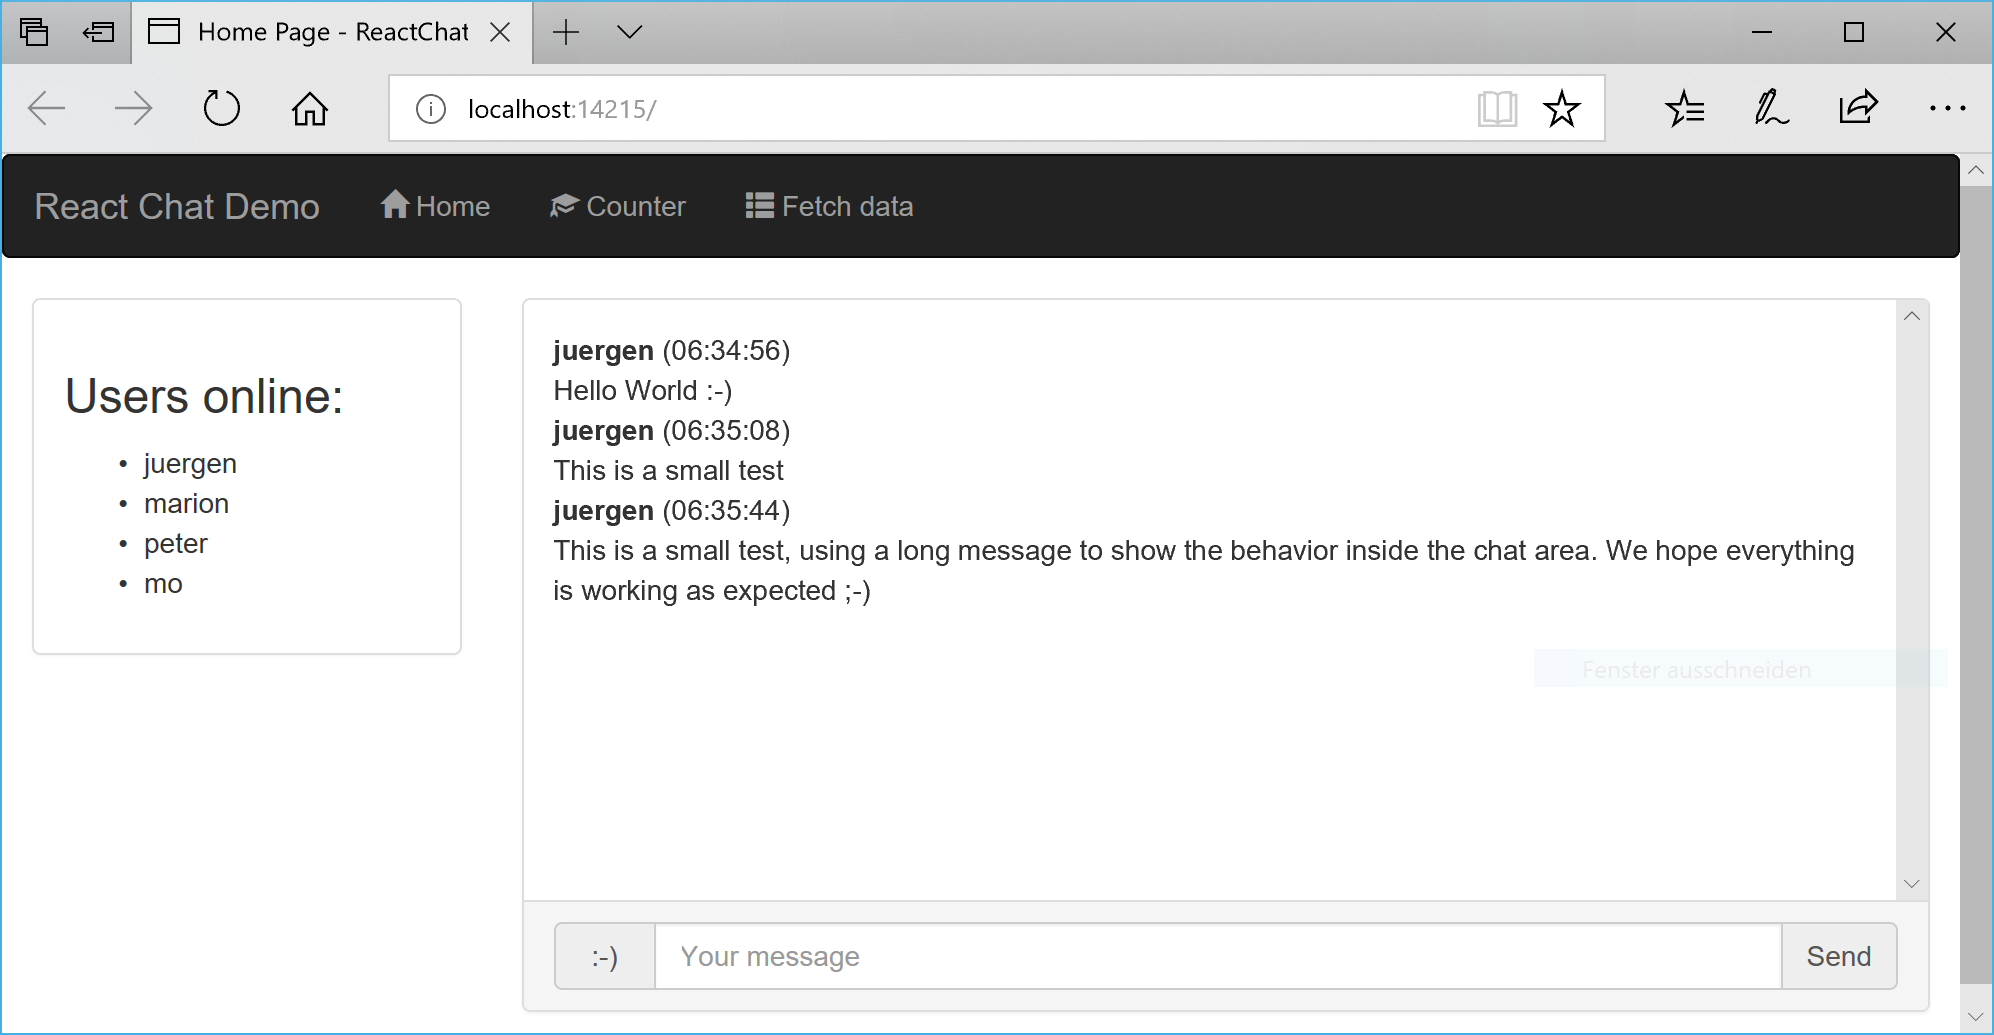
After pressing F5, I see the working chat UI in the browser
Closing words
By closing this post, the basic UI is working. This was easier than expected, I just stuck a little bit, by accessing the HTML elements to focus the text field and to scroll the chat area and when I tried to access the current instance using this. React is heavily used and the React community is huge. This is why it is easy to get help pretty fast.
In the next post, I'm going to integrate SignalR and to get the Websockets running. I'll also add two Web APIs to fetch the initial data. The current logged on users and the latest 50 chat messages, don't need to be pushed by the Websocket. Using this I need to get into the first functional component in React and to inject this into the UI components of this post.